Compost
The key ongoing maintenance for the beds is adding the very essential compost.
After a year of no-dig, the bed will be fertile enough to just need 50 cm of top up with compost. Especially if you had left the roots of the finished plants in the soil. Hopefully, you have also managed to grow cover crops where their roots and top vegetation have been consumed by the soil inhabitants too.
So where is this compost coming from? In your first few years of no-dig gardening, You might not have managed to build up enough compost in your bins. There is no shame to buy compost to add to your beds. In some situations your only access to it might be by buying it.
Ideally if you have room, you can make your own compost as it is likely to be superior to the bought one. It will also be much cheaper and easier on your back!
Making the Compost
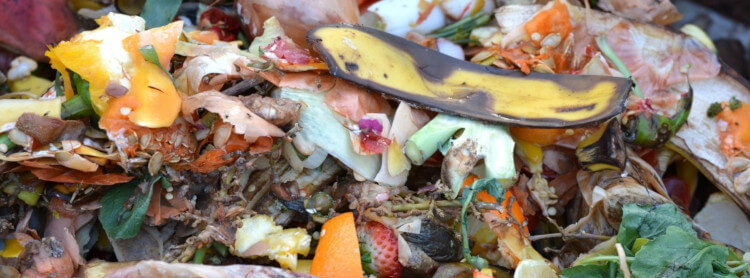
The materials you would use for composting are the residual vegetal waste from the kitchen and garden that would normally go to the landfill. These are usually put in a container and left to decompose. It will eventually turn into a kind of super food for the soil. Lets look at a few options for the containers.

The Heap
The simplest is the “heap” where you set aside an area in the garden. The advantage is that you just dump all your composting material on it without having to open lids. This easy access might mean that it is added to more often.
The disadvantage is that it is dependent on the weather. A small heap will just stop working if the weather is too cold or too wet. Harsh sun can dry it up and it will slow or stop too. Some wildlife might come and dig around and spread it all about!
But if you are just starting out, this will do and it will help you collect material until/if/when you have a more sophisticated system.
Plastic Bin

The disadvantage is that “turning the compost” is much more difficult especially if the top opening is narrow. But in most cases, that might not be necessary. You will still have to check that the moisture level is right for composting to happen.
It is worth checking as some local councils may sell these at a discounted rate. Some may even give them away.
Home Made
If you are considering making one yourself, it is not difficult. But there are a few suggestions worth following: * Have two or three compartments. It will allow different stages of decomposition in each. * Each compartment needs to be at least one cubic metre (or a cubic yard). This will speed up the process greatly. * Have some kind of protection from the rain and sun. A removable lid is great or a kind of roof is also good. * Protect the structural wood from contact with the compost. The organism that is decomposing the material inside will do the same to any wood. A heavy duty plastic sheet as a barrier will help.
What to Compost
Yet again, I would ask you to check what happens in nature. It does not care about carbon to nitrogen ratio (brown to green ratio). Hot composting is not nature’s way either. The elevated temperatures might drive away some necessary organisms, leading to incomplete composting. However, neither are we doing things totally natures way. We would not like to wait too long before getting something usable. Hence the suggestions in this post.
So please do not over complicate things. Just get on with making the damn thing in whatever way suit you and your situation! However, there are a few things I would avoid composting: * Do not use grass cuttings where the lawn has been treated with a selective weed killer. These will survive composting and kill your plants too. These weed killers can sometimes be mixed in with lawn feeds and be potent for some years. * Manure is generally good to use except where the animal producing it has been grazing on pasture or fed hay that has had this weed killer applied. * Avoid putting in aggressive perennial weeds whose seeds will happily start growing in your beds. * Be wary of wood shavings or sawdust as they can come from treated wood. Some wood treatment chemicals are toxic if it gets in the food chain.
Turning the Compost
The decomposing process can be speeded up by physically “turning” the materials in your bin. Turning allows more air into the pile and the increased oxygen content speeds up the bacterial action.
As we know, the laws of physics says that higher activity is accompanied by a higher temperature. So the temperature of the pile will rise. Up to a certain point, we welcome this extra speed and temperature. But then the heat will start to drive away some organisms (worms, etc.) that are doing the work. Then the end result is compost that is not as rich as it could be.
Rather than the complication of getting a compost thermometer, just monitor your pile (feel it with your hands - cool to comfortably warm is fine). If it gets beyond lukewarm, reduce how often you turn it. My experience is that once every two weeks or less seem to be just fine.
If for whatever reason, you do not bother with turning, that is fine too! It will just take a little longer for your pile to break down.
Fertilisers
Maybe it is a departure from what happens in nature but there is a time and place for the right fertiliser. Forget the complex preparations on the garden centre shelves. We will be looking at Blood, Bone and Fish (BBF) and also the Seaweed liquid.

If you then follow the principles of holistic gardening outlined on the Home page, after a year the bed can be treated as no-dig bed and not need BBF. But good quality BBF is fine to use again if your situation and environment are not ideal. If it help get the plants to grow, the microorganisms in the soil will appreciate the plants and do their job of enriching the soil.
Seaweed itself is good for adding micro-nutrients to the compost bin. However, if you are not near the sea, a concentrated liquid version can do wonders. I find that if you dilute it as directed, it can act as a “rescue remedy” for the plants.
For example, I had planted plum tree that struggled for the first two years. In the second year, the aphids stripped all the leaves from the poor tree. At the beginning of is third year, I regularly sprayed the leaves that appeared with the seaweed solution. The photograph shows it in full leaf following the sprayings. All plants have a natural self defence system that repel pests and disease if they are in a healthy environment. I believe that the micro-nutrients in seaweed helps boost their defences.
Seaweed solution is good as a foliar feed but can also be applied to the growing medium if the plants seem to be struggling.